I made a YouTube video about this. Click here to check it out. If you’d rather read an article, continue below.
Networking is a fundamental aspect of modern day technology. Understanding how a network functions is essential for any IT professional. One of the best ways to gain practical experience (without screwing anything up in real life) is by using a tool from Cisco called Packet Tracer. In this post I will be share my experience of setting up a SOHO network with 3 subnets/VLANs for 3 different departments along with the challenges I faced while setting it up.
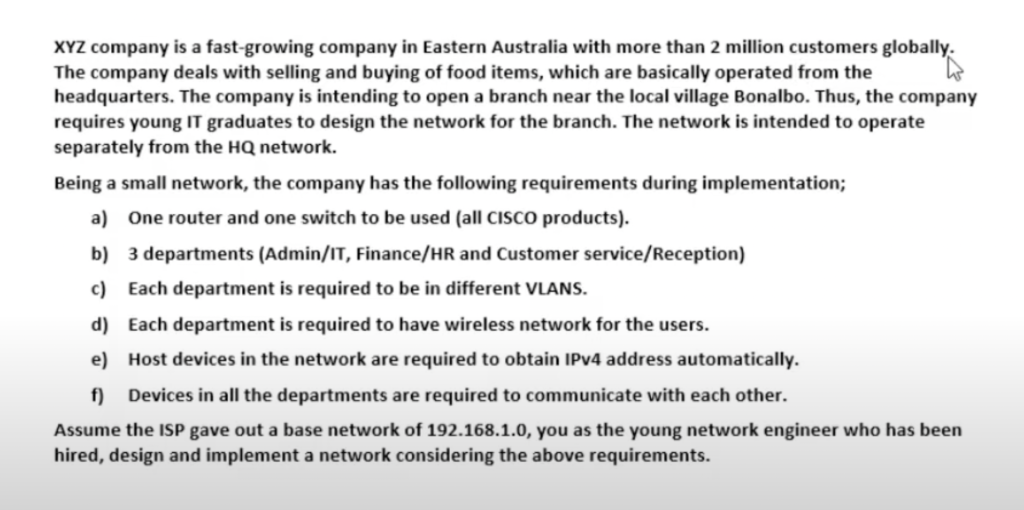
Here is the scenario that we were given above.

Here we start off by adding our first device, a router. A router is a crucial Layer 3 networking device that connects multiple networks and allows communication between devices on different subnets.

After adding the router I proceeded to add all end devices such as PCs and routers. I also included an Access Point in each subnet so devices could connect to the network wirelessly. An access point is a wireless networking device that allows wireless communication over radio frequencies. I also added a switch in the middle, which also connected to the router. A switch is a layer 2 device. the primary function of a switch is to connect multiple devices on the same LAN and forward data packets between them based on their MAC address.
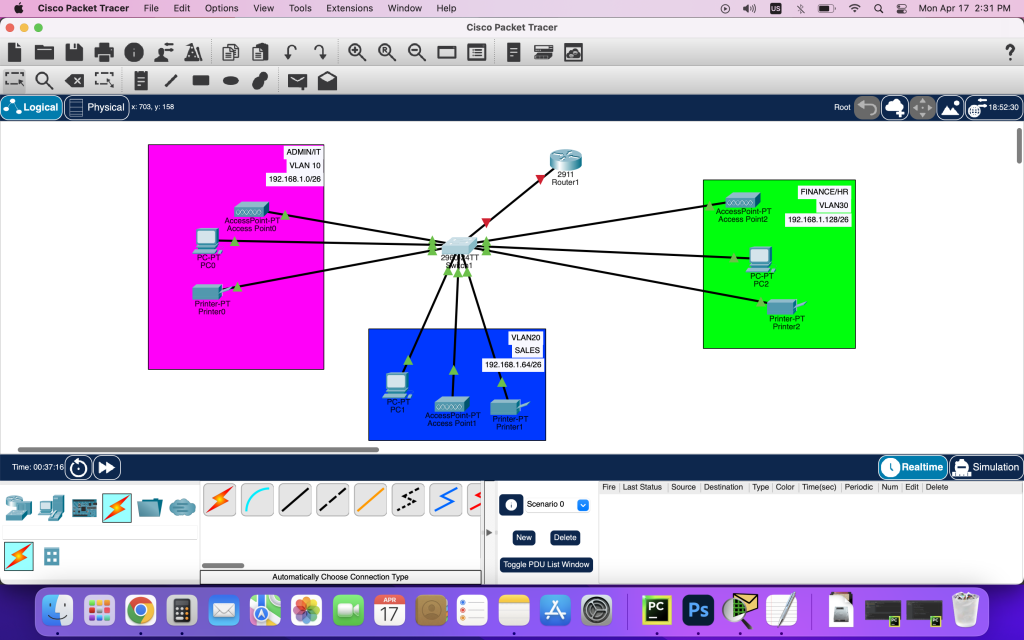
Here we labeled everything to make it easier to understand

After adding the end devices and connecting them to the switch and router, I configured the switch to support VLANs (Virtual Local Area Networks). VLANs are a way to divide a physical network into multiple logical networks (on the same physical infrastructure), allowing different groups of devices to communicate with each other while keeping their traffic separate from other groups. For example, without VLANs, you would need 3 separate routers in this network topology opposed to mine where there is only 1 router. In my network, I set up 3 VLANs, one for each subnet. In the screenshot above, you can see me creating the VLANs using the switch’s CLI. I assigned each VLAN a range of ports. For example, VLAN 10 got port 0/2, 0/3, 0/4. This allowed devices on each subnet to communicate with each other while keeping their traffic separate from the other subnets.
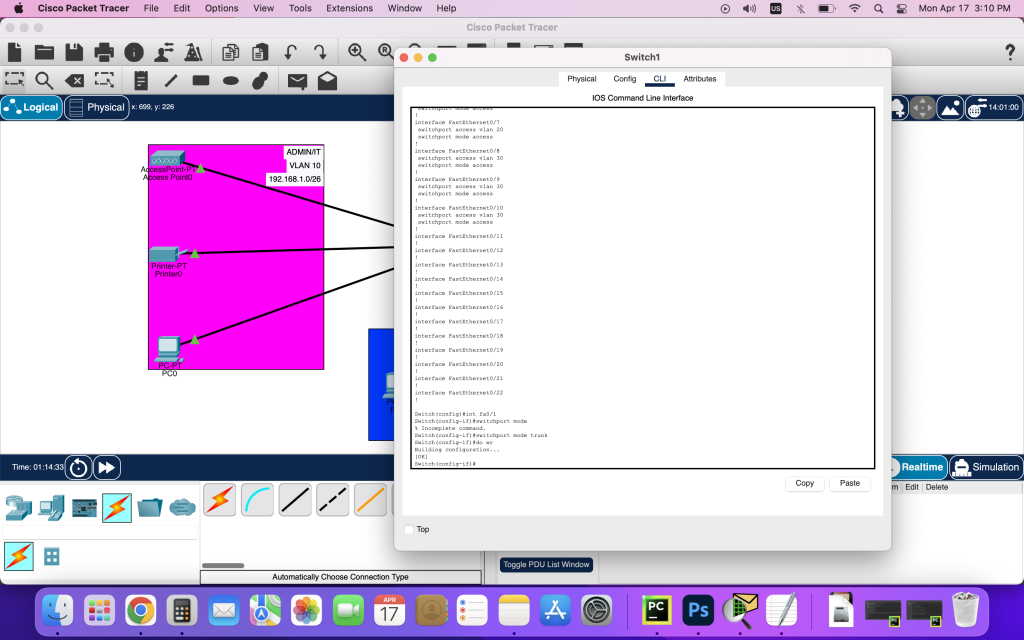
After setting up VLANs, I needed a way for traffic to flow between the VLANs. To do this I created a trunk port on the switch. A trunk port is a special port that can carry traffic for multiple VLANs simultaneously. With the trunk port in place, the switch could now forward traffic between the VLANs while keeping the traffic separate and secure.
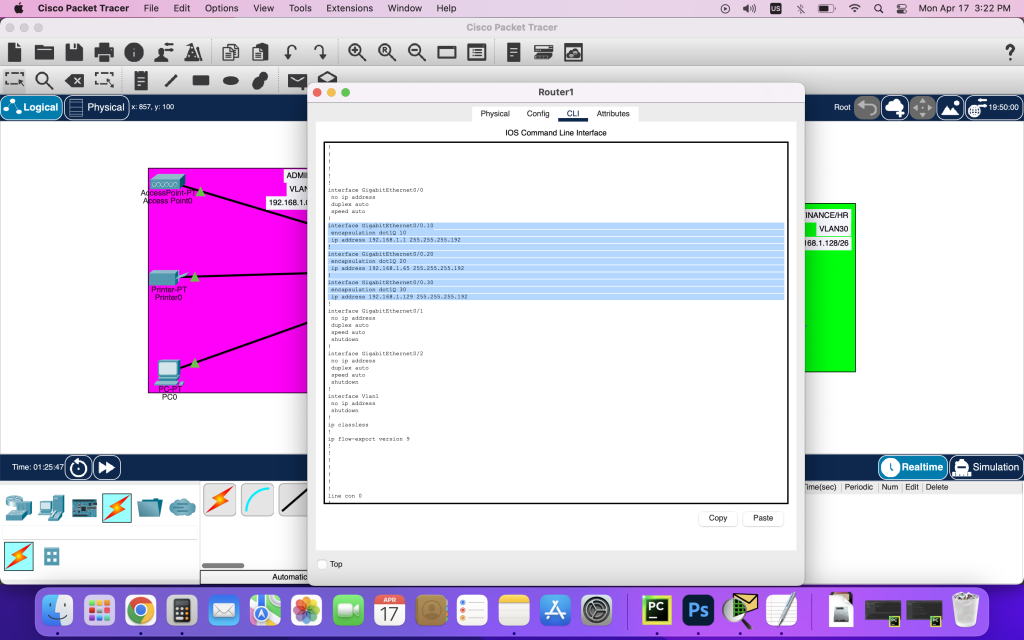
Next, I am using the command ‘encapsulation dot1Q 30’ to configure the sub-interface to use 802.1Q VLAN tagging with VLAN ID 30. I did this for VLAN 10, 20, and 30. This will allow the router to handle traffic for each VLAN and route it between the different subnets in my network. By setting up the sub-interface with the proper encapsulation, I can ensure that traffic is being handled correctly and routed to the appropriate VLAN.

After configuring VLANs, I set up DHCP on the router to automatically assign IP Addresses to each device connected to the network. DHCP is a protocol used to automate this process without manual configuration. I started by enabling DHCP globally on the router, and then created a DHCP pool for each subnet. Each pool was assigned their range of IP addresses that could be assigned to devices, as well as other options such as the subnet mask and default gateway. If you look closely in this screenshot I made a mistake and put 182.168.1.64 for the Sales Pool, which ended up giving us an APIPA address later as I tried to connect devices to the network.
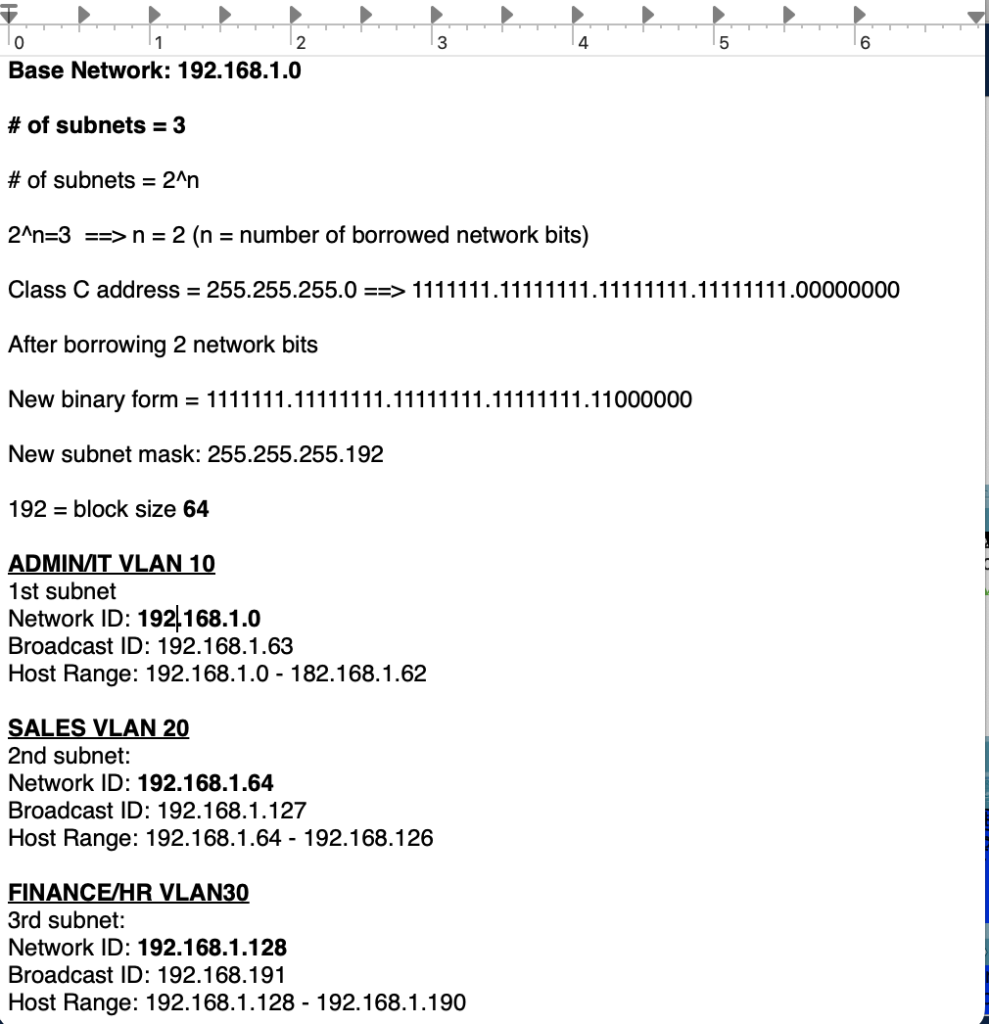
Here is each subnet and their corresponding IP ranges.
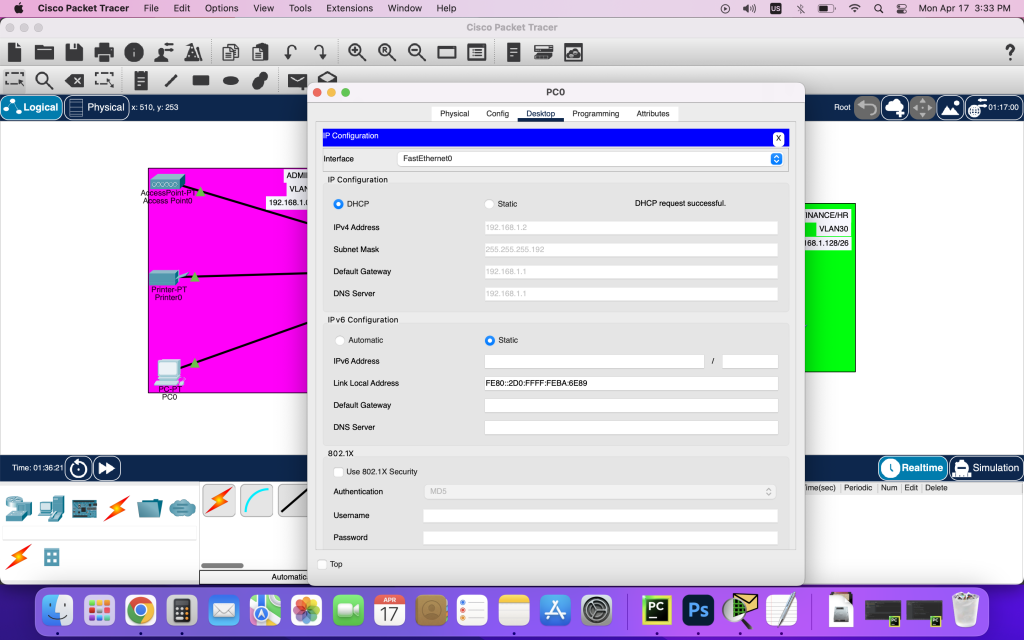
Here, connecting the PC in the Admin/IT subnet was simple. I switched the IP Config mode to DHCP instead of Static and it worked as it should.

But when I tried to do that for the PC or Printer on the Sales subnet, I kept getting an APIPA address, which means DHCP wasn’t able to assign me an IP address. after some troubleshooting and google searches, I found that my issue was that I made a typo in the initial set up of the Sales DHCP pool. As you can see I typed 182.168.1.64 instead of 192.168.1.64. After switching it to 192.168.1.64 the PC and printer were finally able to get an IP address assigned to them.
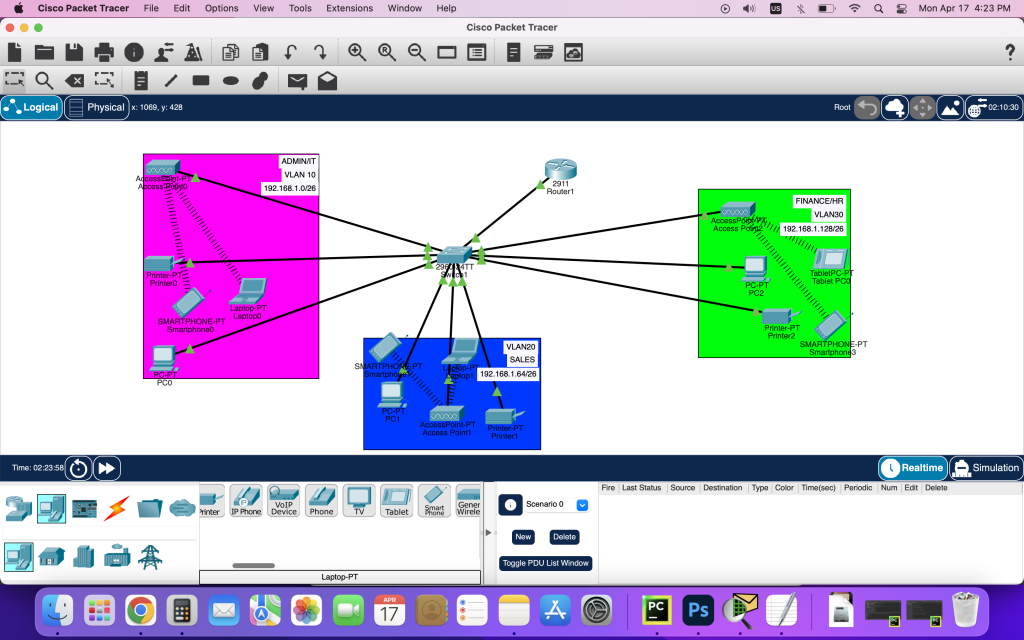
Here is a screenshot of the entire network with everything working. I also added some wireless devices and connected them to their Access Point.

And here I started pinging several different devices to verify connectivity across the network.
In conclusion, setting up a network with multiple subnets and VLANs can seem daunting at first, but with the right tools and knowledge it can be accomplished. By using Packet Tracer I was able to create a network with three subnets and VLANs, allowing me to isolate traffic and improve network performance/security. Additionally, by configuring DHCP, I was able to automate the process of assigning IP Addresses to each host. Making it easier to manage and maintain.