Expanding your organizations Active Directory environment is a crucial task to ensure high availability, redundancy, and load balancing. It is best practice to have at least 2 domain controllers in a production environment. Depending on the size and geographical distribution of your organization, you might need more. I will walk you through how to add a new domain controller to your Active Directory forest.
Prerequisites:
- Existing Active Directory environment
- User account that is part of Domain Admins, Enterprise Admins, and Schema Admins
- New Windows Server prepared
- Ensure the new server has a static IP assigned to it and can resolve your Active Directory domain name
Prepare the New Server

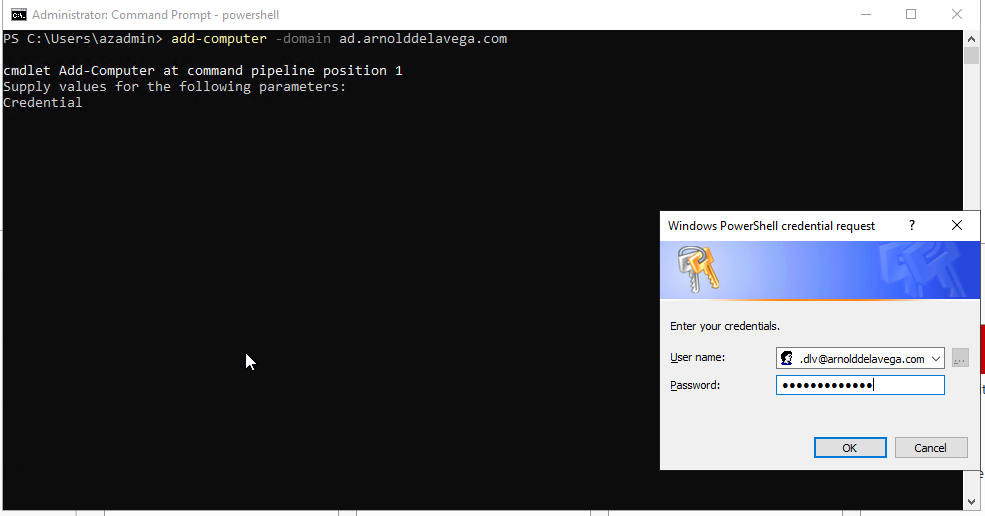
- First let’s join our server to our Active Directory domain.

2. Ensure your server has the desired host name.
Adding The Active Directory Role

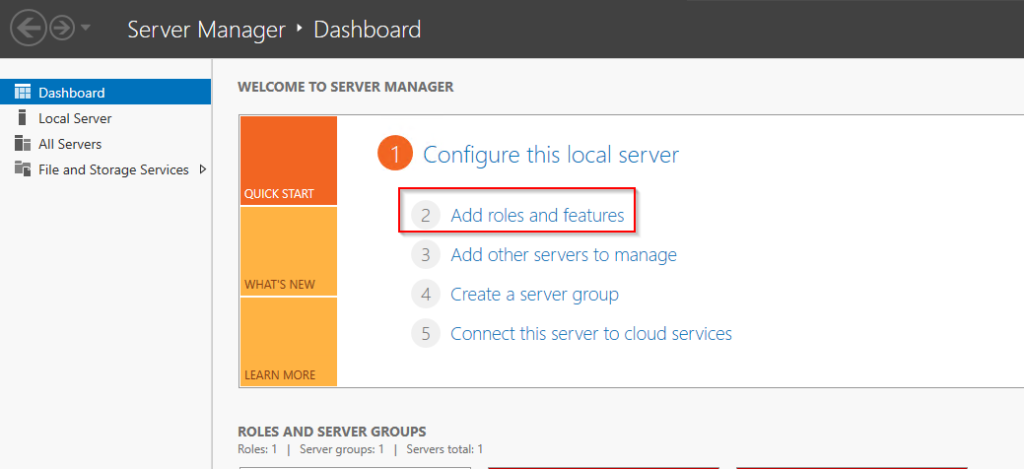
3. Click on Add roles and features

4. Click next until you get to this screen. Ensure you select Role-based or feature-based installation.

5. Click next until you get to the Server Roles section of the wizard. Here, select Active Directory Domain Services.

6. You will get a pop up to add additional features that are required for Active Directory Domain Services. Go ahead and agree, click Add Features.

7. Click Next until you get to the Features section of the wizard. Ensure Remote Server Administration Tools is selected, specifically the AD DS and AD LDS Tools.

8. Click Next until you get to the confirmation page of the wizard. Click Install. It may prompt you to reboot after finished installing.
Promote Server to a Domain Controller

9. In Server Manager, you will see an icon. Click on it, and you will get a message telling you to Promote this server to a domain controller. Click on it.

10. Click on Add a domain controller to an existing domain. Then fill in the Domain field with your Active Directory domain name.

11. Supply the credentials of an account that is a part of the following groups:
- Domain Admins
- Enterprise Admins
- Schema Admins

12. Create a DSRM password and keep it somewhere safe, such as a password manager.

13. You might get a pop up for this delegation for this DNS server cannot be created, go ahead and click Next.

14. On the Additional Options section of the wizard, go ahead and select Any domain controller from the Replicate from dropdown menu. You can also select a specific domain controller from this dropdown menu in case you know some domain controllers in your forest are problematic.

15. Click through until you get to the Prerequisites Check section of the wizard. Then click Install.
16. It may prompt you to reboot after it is all done.
Verifying Domain Controller

We can now see that our new Domain Controller shows up in the Domain Controllers OU.

17. Let’s ensure replication is working properly between all domain controllers. To do this, run:
repadmin /replsummary

18. Let’s also check the DNS Forward Lookup Zone to see if our new Domain Controllers A record got added.

19. Lets say you want to move FSMO roles as well to your new domain controller. Let’s check who holds the FSMO roles first. You can do this by running:
netdom query fsmo

20. To move FSMO roles to a new Domain Controller, simply run powershell as an adminstrator and use:
Move-ADDirectoryServerOperationMasterRole -Identity AZ-DCW22-01 -OperationMasterRole 0,1,2,3,4
We then run netdom query fsmo again to verify the changes took affect.
You now have a new domain controller in your Active Directory forest. This new domain controller will help distribute the load, provide redundancy, and improve fault tolerance. If you’ve also moved FSMO roles, your new domain controller now plays a critical role in your AD infrastructure. Always remember to monitor your domain controllers for replication issues and ensure regular backups are in place to protect your environment.