Adding your own custom domain in your Entra tenant is a crucial step in your organizations branding. Without this, you’re stuck with the default onmicrosoft.com suffix, which isn’t ideal for a professional or branded experience. I will walk you through how to add a custom domain to your Entra tenant.
Prerequisites
Please ensure you have the following before beginning:
- Access to your domain registrar
- Global Administrator Permissions
Accessing the Entra portal

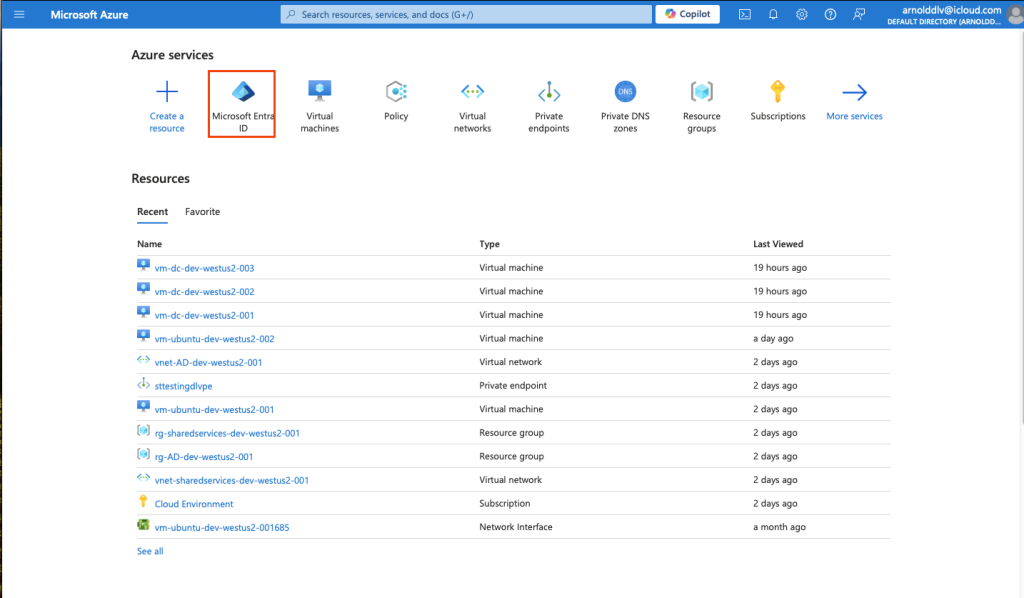
- Login and access the Entra portal with a Global Administrator account.

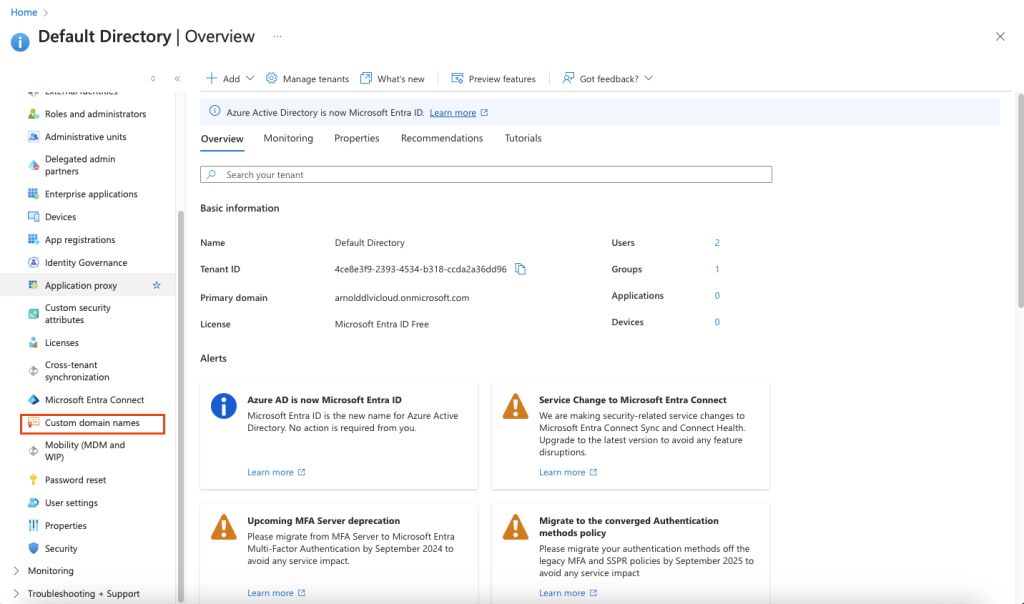
2. Navigate to Custom domain names.

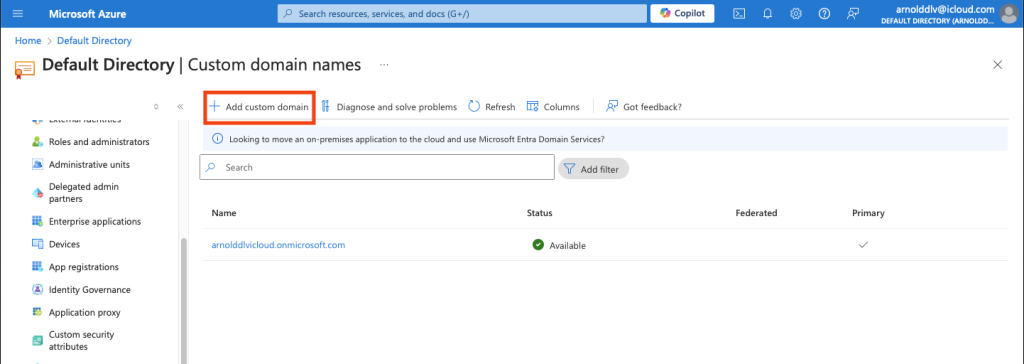
3. Click on Add custom domain.

4. Enter your domain name. Then click Add domain.

5. Here you are prompted to verify ownership of your domain. Depending on your domain registrar, steps may vary. All you have to do here is create a TXT or MX record with the given values for your domain in the domain registrar. Click Verify when you are done. It may take a little bit for the new DNS record to update and show, so you might get an error saying it cannot verify, just give it a few moments and try again.

6. After successful verification of the domain, you now have two domains in your Custom domain names. If you want to make your new custom domain the Primary domain, go ahead and click on it.

7. Click Make primary.

8. Click Yes.

Now you can see that there are multiple domain options when creating a new user in your Entra tenant. Since my custom domain is now the Primary domain, it was selected automatically.
Adding a custom domain to your Entra tenant is a straightforward process that every organization should do to provide a more professional identity for your users. With your domain in place, your users will now have a sign-in experience that aligns with your organization’s brand.